


Learn how to make a reverse canvas using Heat Transfer Vinyl. Create beautiful custom canvas art using the Silhouette Cameo or Cricut!

Doing a reverse canvas has been on my to-do list for some time. I got tired of looking at my bare walls and decided to try it. Reverse canvas can be addicting, I’ve warned you! Once you get the hang of it – you’ll want a reverse canvas everywhere in your home! The reverse canvas tutorial does have a lot of steps but it is quite easy once you get the hang of it. The hardest part is removing the staples but with the right tools, you’ll get it done in no time! Post contains affiliate links. It just means I make a small commission if you purchase anything through my links. There is no additional cost for you.
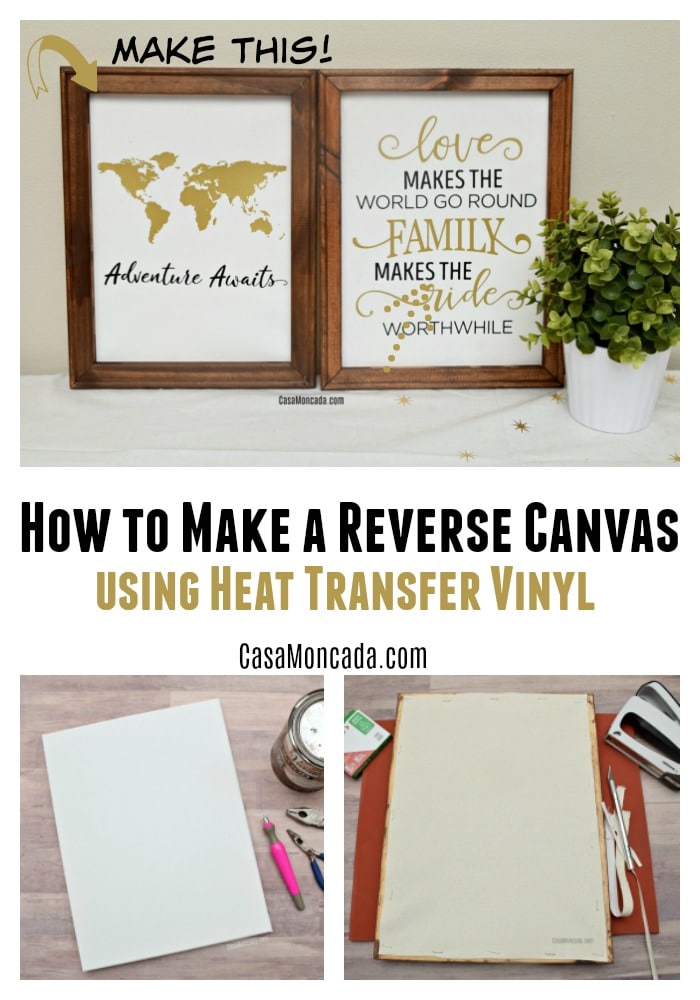
You’ll find a ton of reverse canvas ideas all over Pinterest nowadays. Find the design that works with your home style. I went with a worldly/travel reverse canvas art. I used gold and black Heat Transfer Vinyl. Many people just use black HTV but I really wanted it to pop! My home has gold accents so it works.
Stretched canvas comes in so many different sizes pick the size that works for you.

How to Make a Reverse Canvas using Heat Transfer Vinyl (HTV)
Supplies needed to make a Reverse Canvas
- Stretched canvas (Mine are 11 x 14)
- Heat Transfer Vinyl (I used Gold and black)
- Cricut EasyPress, iron, or Heat press (plus Teflon sheet)
- Wood stain (I used Dark Walnut) or chalk paint
- Flathead screwdriver
- Pliers
- X-acto (or something similar)
- Silhouette Cameo or Cricut cutting machine
- A light duty stapler (like this one)
- Weeding tools
- Nail-on Sawtooth Mounts (to hang the Reverse Canvas)
- Design #78072 (World map or similar from Etsy) and Design #119567 (quote) from Silhouette Design Store

Directions:
Step 1: Start by removing the staples on the back of the canvas. You’ll need to use some elbow grease here. Use the flathead screwdriver to pop the staples out. There is a staple remover (sold in home improvement stores or Amazon) that makes it SO much easier but you can use what you have at home. Remove all the staples then use pliers to remove them completely. This is the hardest part, I promise!

Step 2: Carefully remove the canvas frame. Put the canvas material to the side. Stain the canvas frame (be sure you are staining the nicer side of the frame – the part that was covered) and allow to dry. I let mine dry for 24 hours.


Step 3: Open Silhouette Studio or Cricut Design Space and load the world map design. I typed “Adventure Awaits” using Crushine Brush Script font (I added a glyph to the “s”) to give it that extra line. If you are using one color of heat transfer vinyl, just mirror your design and send it to cut. Be sure to select Heat Transfer Vinyl, smooth as your material.
If you are using more than one color of HTV, separate the colors, mirror, then send to print.

Step 4: Weed the design using your weeding tools. Carefully align the design on your canvas material. Use the Cricut Easypress, iron, or Heatpress to adhere the design to the canvas. I used the Cricut EasyPress set to 315 degrees for about 5-10 seconds. Just keep checking and press a few more seconds if anything lifts.
Step 5: Place the wood canvas frame on top of the canvas design. Be sure to align them carefully. Flip over and staple each corner to hold the canvas in place (make sure it is taut). Staple the rest of the sides.

Step 6: Use the X-Acto knife to trim the excess canvas material that hangs off the side of the wood frame. I prefer to do it after to ensure I cut the right amount of material. You can definitely do it in the beginning once you remove the staples. Just eyeball it.
Step 7: (Optional) If you want to hang the reverse canvas art, Nail-on sawtooth mounts worked really well for me. I used anchor screws on my drywall then placed the nail-on sawtooth mount in the back of my canvas on the top middle part of the wood frame.
You are all done! The reverse canvas art tutorial seems long but once you get the hang of it – you’ll be doing them so fast! I made two canvas for an area in my living room that was bare! We’ve been here over a year and I never put anything up. Now it has beautiful artwork! The gold heat transfer vinyl really makes it pop!

There are some DIY Reverse Canvas tutorials that use regular vinyl. If you do not have any HTV at home – using regular vinyl works too! Add a layer of Mod Podge to the canvas material then place your vinyl. The Mod Podge gives it a better grip. I think having Heat Transfer Vinyl on the reverse canvas is easier.
The canvases from Michael’s are my favorite. Use a coupon or wait for them to go on sale. I used one canvas from Michael’s and one from Walmart, I can definitely see the difference in the wood frame. I prefer Michael’s – it looks nicer. Amazon also has a great deal on a 7-pack of 11 x 14 stretched canvas.
Have you tried to make Reverse Canvas Art?
Want to see another DIY project I made with Canvas and Heat Transfer Vinyl?


