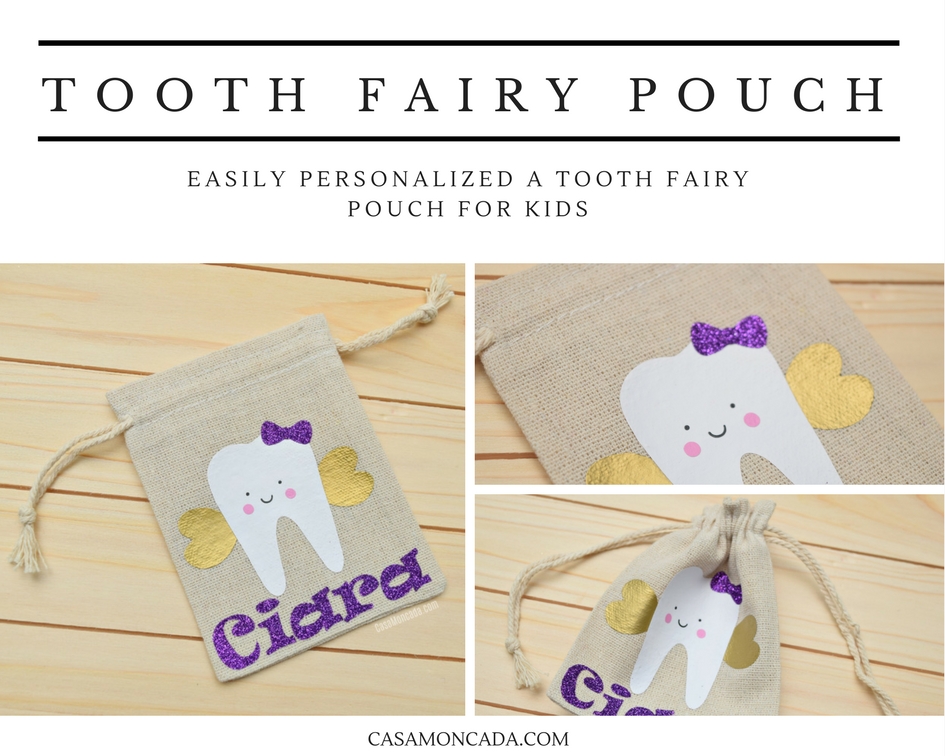
Tooth Fairy Pouch
My daughter announced (giggling), that her tooth was wiggly. I had a mini panic attack inside but outside I showed my enthusiasm. My baby, my princess, my only daughter was growing up. I knew the time was coming but just did not want to face it. You guys understand, right? Since I’m that mom – I had to go all out with this tooth fairy business. Making it special and an unforgettable experience was top of the list for me. So I did what all moms do, I told her we would make a special tooth fairy pouch to hold our precious baby tooth.

We browsed the Silhouette Studio Store and found the perfect tooth fairy image. She went with a tooth fairy with a bow but she wanted a sparkly glitter bow in purple (because it is her favorite color, of course). Luckily, I had all the materials I needed.

Using my trusted Silhouette Cameo 3, I set everything up and got to work!
Post contains affiliate links. It just means I make a small commission if you make a purchase through any of my links. It is, however, no additional cost to you.
DIY Tooth Fairy Pouch Instructions:
Materials:
- Silhouette Cameo (or another die cutting machine)
- Iron-on vinyl
- Silhouette design studio cut file
- Cotton Muslin Drawstring bags (like these)
- iron
Instructions:
1.Open the tooth fairy file in Silhouette Studio. The file will be transferred to the mat together. Be sure to adjust to the size you need by selecting all the files at once. (This way the pieces are proportionate). The wings in my pouch measure 3.032 inches across. The pouch measures about 3.5 inches across.
2. Once you have the size set, ungroup the pieces. Now, move them on the screen so that each piece that will be a different color is separate. To make it easier, I spaced out each item so I can add each iron-on vinyl color on 1 mat when I am cutting. Be sure to take note of the location on the mat so you know where to lay your iron-on vinyl colors.

3. You want to be sure to use “fill” as the cut option since we will be cutting multiple colors. I changed the material type to Heat transfer material – glitter for one of my pieces. If you are using glitter or another type of Heat transfer material be sure to mark that so the appropriate blade depth and speed are selected. Remember to lay your heat transfer material shiny side down on your mat.

4. Once cut, heat up your iron. On a flat surface lay your cotton muslin drawstring bag and pass the iron on it. Next, lay the tooth fairy wings and pass the iron (use a piece of cloth for protection), then the tooth, face, pink cheeks, and bow. Be sure to pass the iron after each piece is laid.

You should be left with an adorable Tooth Fairy pouch/bag for your little ones to put their tiny teeth in. Use your Silhouette Cameo to easily personalize your adorable Tooth Fairy bag. If you decide to personalized your creation, be sure to mirror the name!


Also, if you want to keep the tiny tooth in a secure place – there are these tiny little containers in the jewelry section of most craft stores. They hold those little tiny beads. They are perfect for holding the tooth inside for safe keeping.
Did you do something special (or plan to do something special) when your child loses their teeth?